What Is a DIY Eyelash Kit and How to Use It?
A Diy Eyelash Kit offers a convenient way to create a fuller lash look at home. Most kits include individual or strip lashes, adhesive, tweezers, an applicator, and removal guidance. Some also provide lash clusters for a softer, more customized effect. Understanding each item matters before touching the delicate eye area.
This guide explains what a Diy Eyelash Kit is and how to use it carefully. You will learn how to prepare clean lashes, measure the correct length, apply a small amount of adhesive, and allow proper setting time. A mirror placed at eye level can improve control. Good lighting helps you notice uneven placement. Small errors matter. Excess adhesive may feel heavy or irritate the eyelid.
Safety should guide every step. Check the product label and follow the manufacturer’s instructions. Perform a patch test when recommended, especially if you have sensitive skin. Never share eye products or use damaged, dried, or expired adhesive. Keep the glue away from the eye itself. Stop immediately if you experience burning, swelling, pain, or vision changes, and seek qualified medical advice when needed.
Results may not look perfect on the first attempt. That is normal. A cluster can sit too close to the lash line, or one corner may lift slightly. Remove the lashes gently with the recommended remover instead of pulling. With patience, clean tools, and realistic expectations, home application can become more comfortable, controlled, and reliable.
What Is a DIY Eyelash Kit?
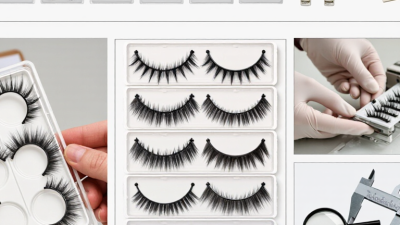
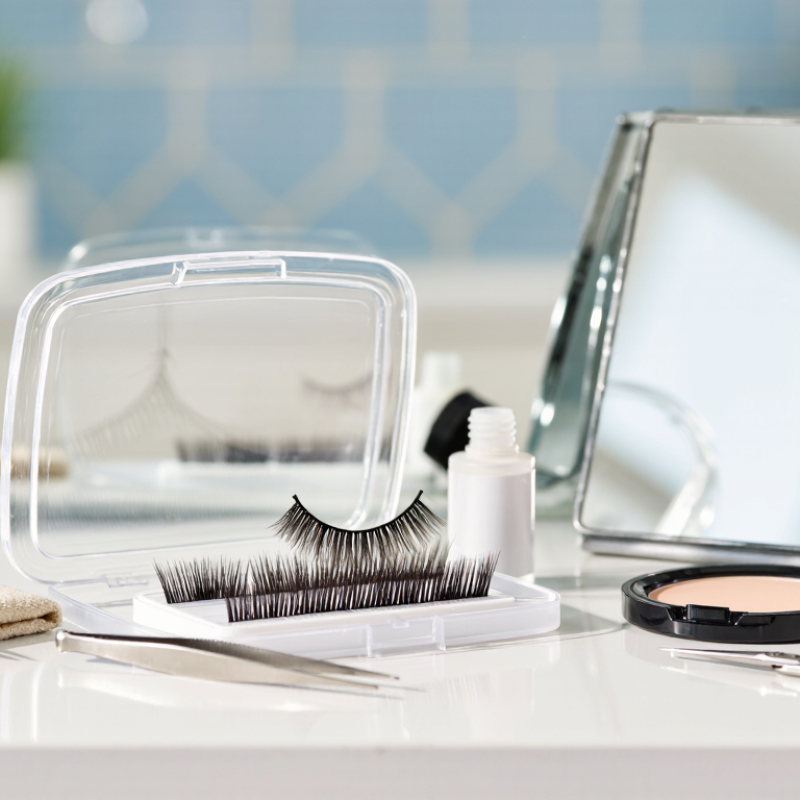
A DIY eyelash kit is a home-use set for applying temporary lashes without visiting a salon. It usually contains lash strips or small segments, cosmetic adhesive, an applicator, and removal instructions. Some kits include under-eye pads or cleanser. Contents vary, so read the label before opening the package.
The global false eyelashes market was valued at about USD 1.6 billion in 2023, according to Grand View Research’s 2024 industry report. This growth reflects rising interest in convenient, at-home eye makeup. However, a DIY kit is not the same as professional eyelash extensions. It should sit on the natural lash line, not touch the inner eyelid or eyeball. Small does not mean simple.
Clean, dry eyelids help the adhesive hold. Trim a strip gradually, rather than cutting too much at once. Apply a thin adhesive layer, wait briefly, then place the lash from the center outward. Never share eye products or use dried, unlabelled adhesive. The U.S. Food and Drug Administration warns that contaminated eye cosmetics may cause infection, and irritation requires immediate removal. I used to assume stronger glue meant longer wear. That was careless. Gentler application, fresh tools, and controlled removal matter more. If redness, swelling, pain, or blurred vision appears, stop using the kit and seek qualified medical advice.
What Is a DIY Eyelash Kit and How to Use It?
A DIY eyelash kit usually combines false lashes with the basic tools needed for application. The chart shows the typical quantity of each core component in a simple single-use kit.
To use the kit, measure the lash strip against your eyelid, trim it if necessary, apply a thin layer of lash adhesive, wait briefly until it becomes tacky, and place the strip close to the natural lash line. Remove it gently and clean the tools after use.
What Materials and Tools Are Included?
A DIY eyelash kit usually includes lash clusters or strips, eyelash adhesive, an applicator, and a small spoolie brush. Some kits also provide under-eye pads, cleansing wipes, a mirror, and adhesive remover. Each tool has a clear purpose. The applicator places lashes accurately, while the spoolie separates natural lashes and checks the final shape. Read the instructions carefully because adhesive drying times can differ.
Before application, clean your eyelids and natural lashes thoroughly. Avoid oily skincare products around the eyes. Test a small amount of adhesive on your skin before use, especially if you have sensitive skin. I once applied too many lashes to one corner, and the result looked heavy rather than balanced. A lighter layer would have been better. Work in a bright room with a steady mirror. Place each lash close to, but not directly on, the waterline.
Tips: Keep the applicator clean and never share eye products. Use less adhesive than you expect; excess glue can feel stiff and uncomfortable. Allow the adhesive to set fully before brushing the lashes. If you notice burning, swelling, redness, or blurred vision, remove the lashes carefully and stop using the product. A trained beauty professional can offer safer guidance when irritation continues. Replace dried adhesive and damaged tools instead of trying to reuse them.
How to Prepare Your Natural Lashes
What Is a DIY Eyelash Kit and How to Use It?
How to Prepare Your Natural Lashes
The global false-eyelash market was valued at about USD 1.6 billion in 2023, according to Grand View Research. More people are trying at-home lash styling, but preparation still matters most. Start with clean, completely dry lashes. Remove mascara, oil, sunscreen, and loose flakes with a gentle, oil-free cleanser. Do not scrub the lash line. It can weaken fragile hairs.
Look closely in a bright mirror. Redness, swelling, crusting, or unusual itching means you should pause. The U.S. Food and Drug Administration advises avoiding eye cosmetics during an eye infection and replacing products that cause irritation. Remove contact lenses before application. Comb the natural lashes with a clean spoolie, then let them dry fully. A soft, controlled curl can help, but repeated clamping may cause breakage. Less pressure works better.
Keep the kit organized. Separate lash segments, applicator, adhesive, and remover before opening anything. Follow the kit’s instructions exactly, because formulas and wear times differ. Adhesive should never touch the eye surface or inner eyelid. Avoid placing extensions directly on irritated skin. I used to think extra adhesive meant stronger hold. It usually means heavier residue and a messier removal. That assumption needs correcting. If burning, pain, blurred vision, or persistent redness appears, remove the product safely and contact an eye-care professional.
How to Care for and Safely Remove DIY Lashes
What Is a DIY Eyelash Kit and How to Use It?
DIY lashes can look polished, but safe removal matters more than a dramatic finish. Choose an eye-safe adhesive, clean tweezers, and lashes that feel light on the eyelid. Never use nail glue or unlabelled products near the eyes. Wash your hands before application, then keep the lash line dry for the time stated in the adhesive instructions.
Careful cleaning prevents buildup. Gently wipe the lash line with a fragrance-free, oil-free cleanser and a soft cotton swab. Do not rub, sleep with wet lashes, or share applicators. A peer-reviewed survey published in Clinical Ophthalmology reported eye-related symptoms in about one quarter of eyelash-extension users. DIY application can create similar irritation when adhesive touches skin or the eye. That figure is not a reason to panic, but it deserves attention. Even careful users can misjudge placement.
Tips: To remove lashes, soften the adhesive with a warm, damp compress for several minutes. Apply an eye-safe remover only as directed. Slide the lash away slowly from the outer corner. Never pull, scrape, or cut attached lashes. If removal feels painful, stop. Redness, swelling, discharge, persistent itching, or blurred vision requires prompt advice from an eye-care professional. I would rather leave a small amount of residue temporarily than damage natural lashes by rushing. This is where many routines go wrong.